Process Portfolio Spread for Project 3.0
5% of Semester Grade
Overview
The Basics
This project is to be a 17 x 11 page spread design that highlights the processes of each phase of Project-3, the Abstract Mark. It is designed to help you identify and document parts of your process in creating the abstract mark and its peripheral components previously this semester. This type of documentation practice is very useful to have in your portfolio to show how you developed your ideas from point A to Z with your work. It should become a habit in all of your projects, as it can be important to show employers and potential clients how you think, what your creative skills are, and the required evolution it takes to fully develop an idea.
Requirements
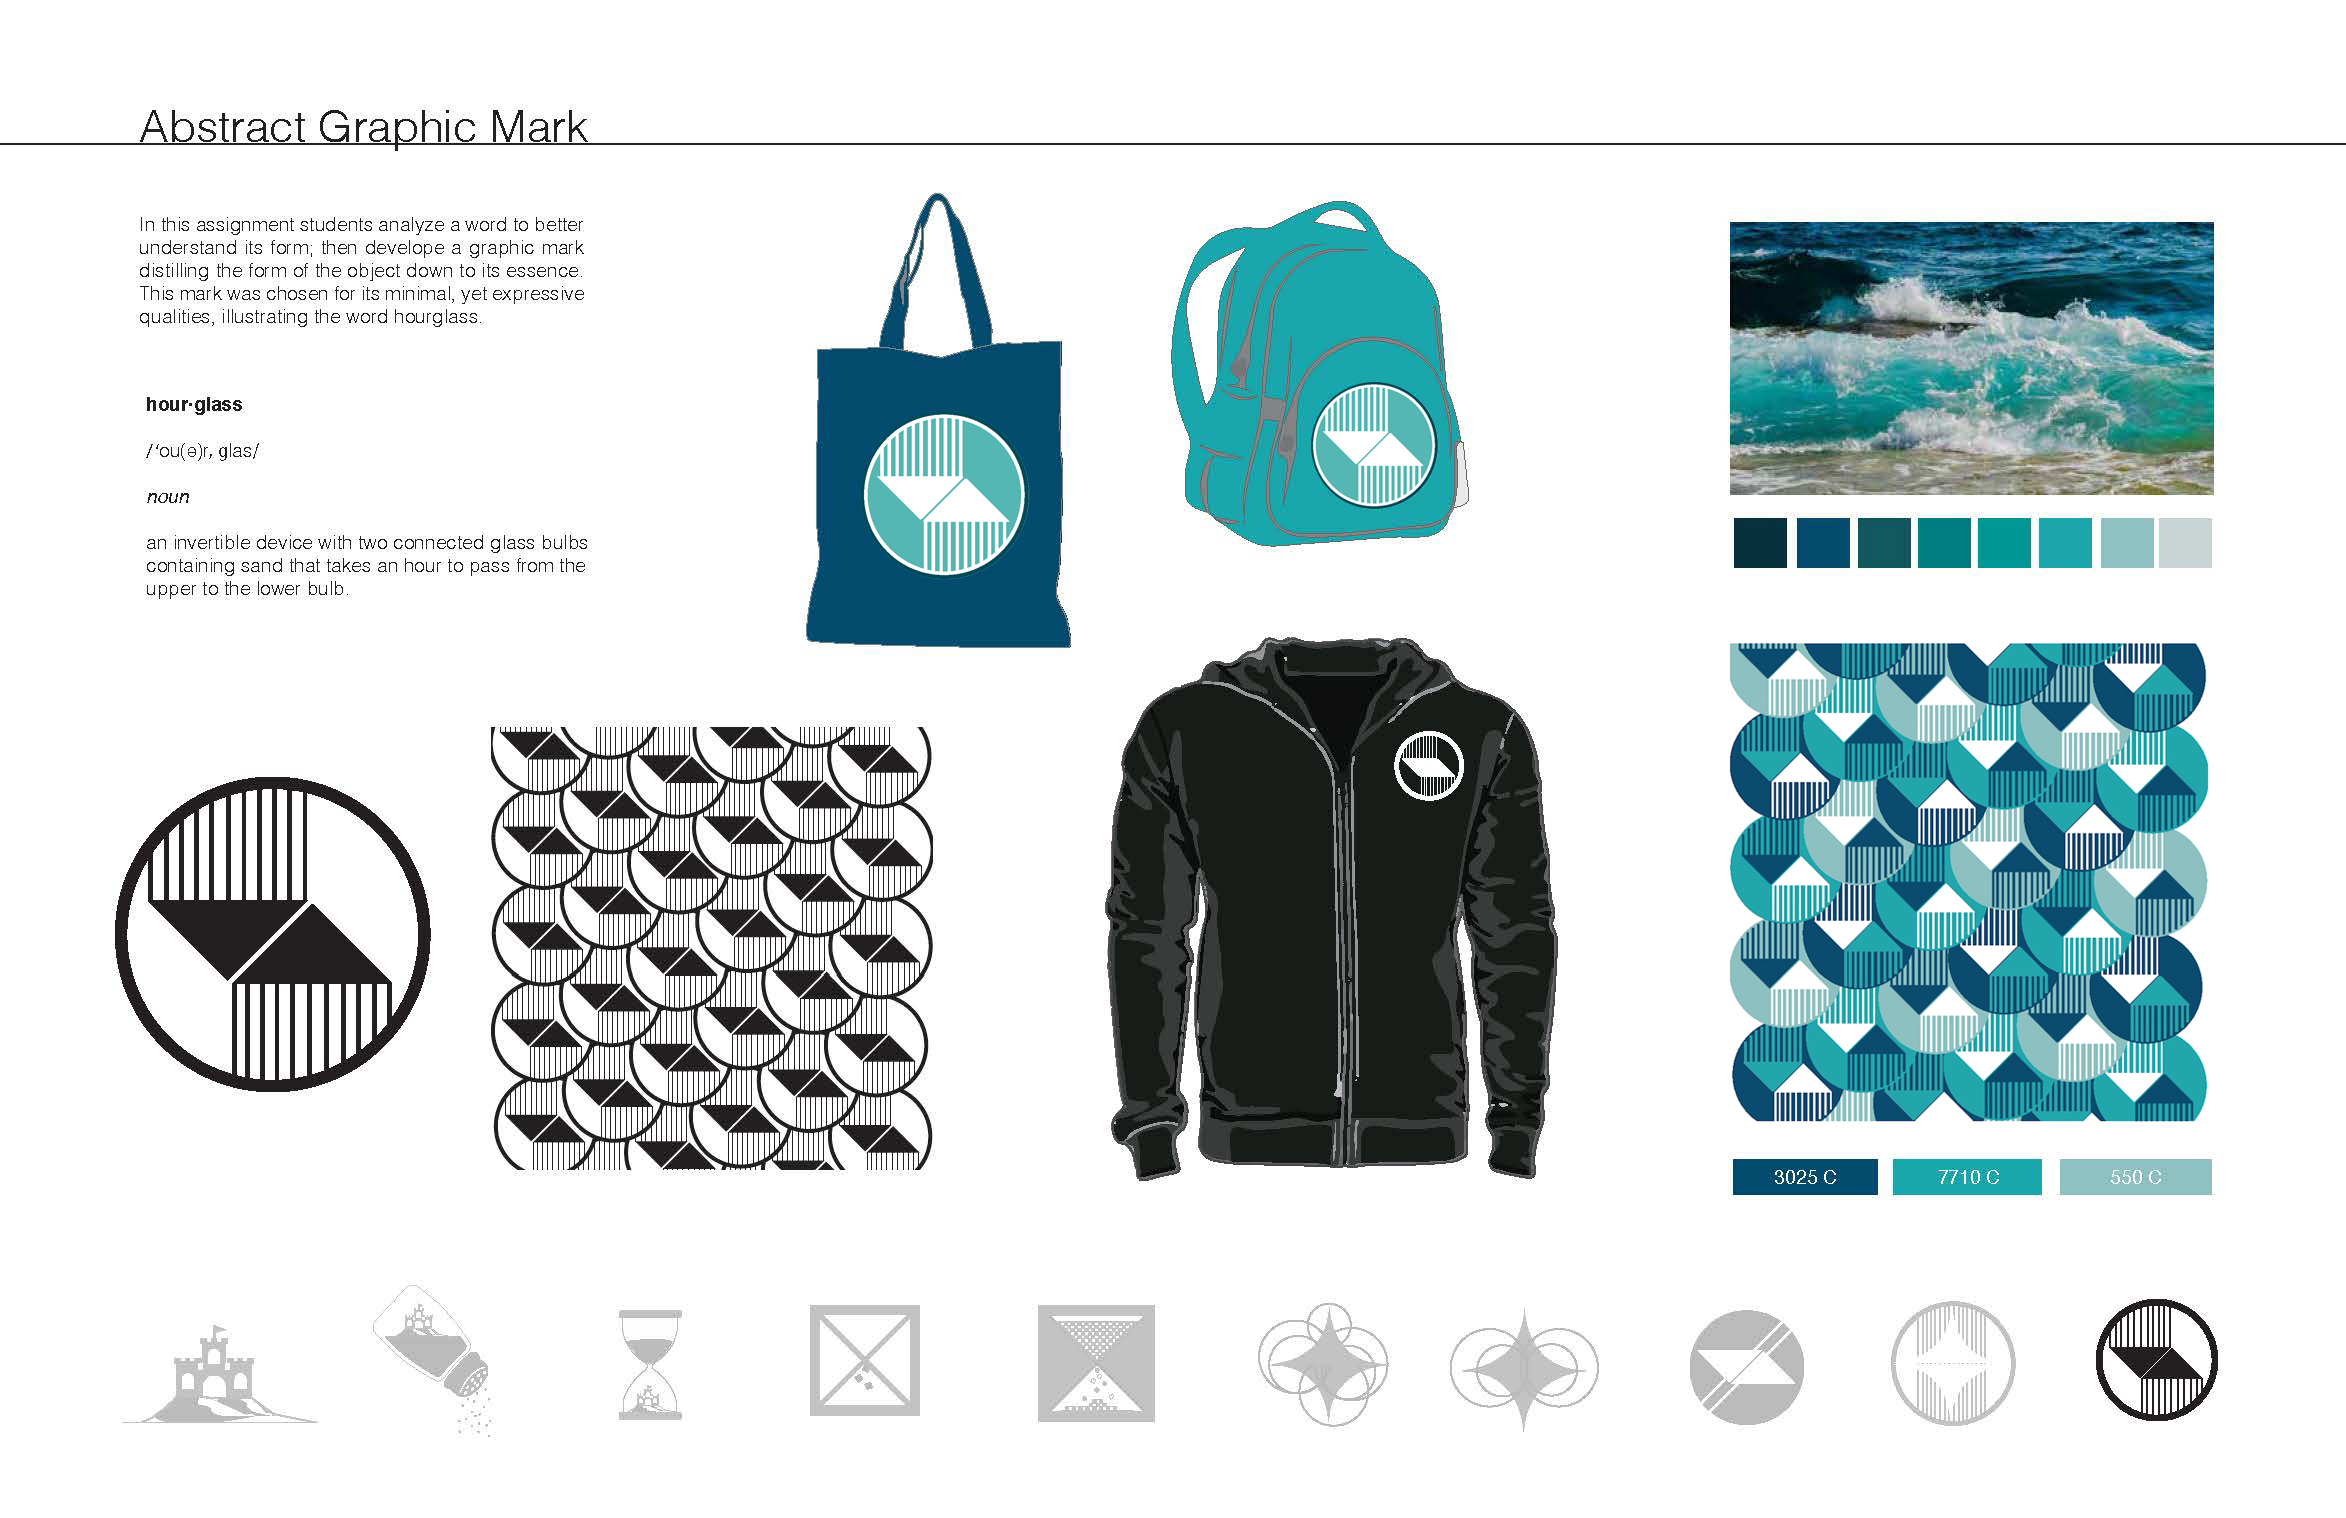
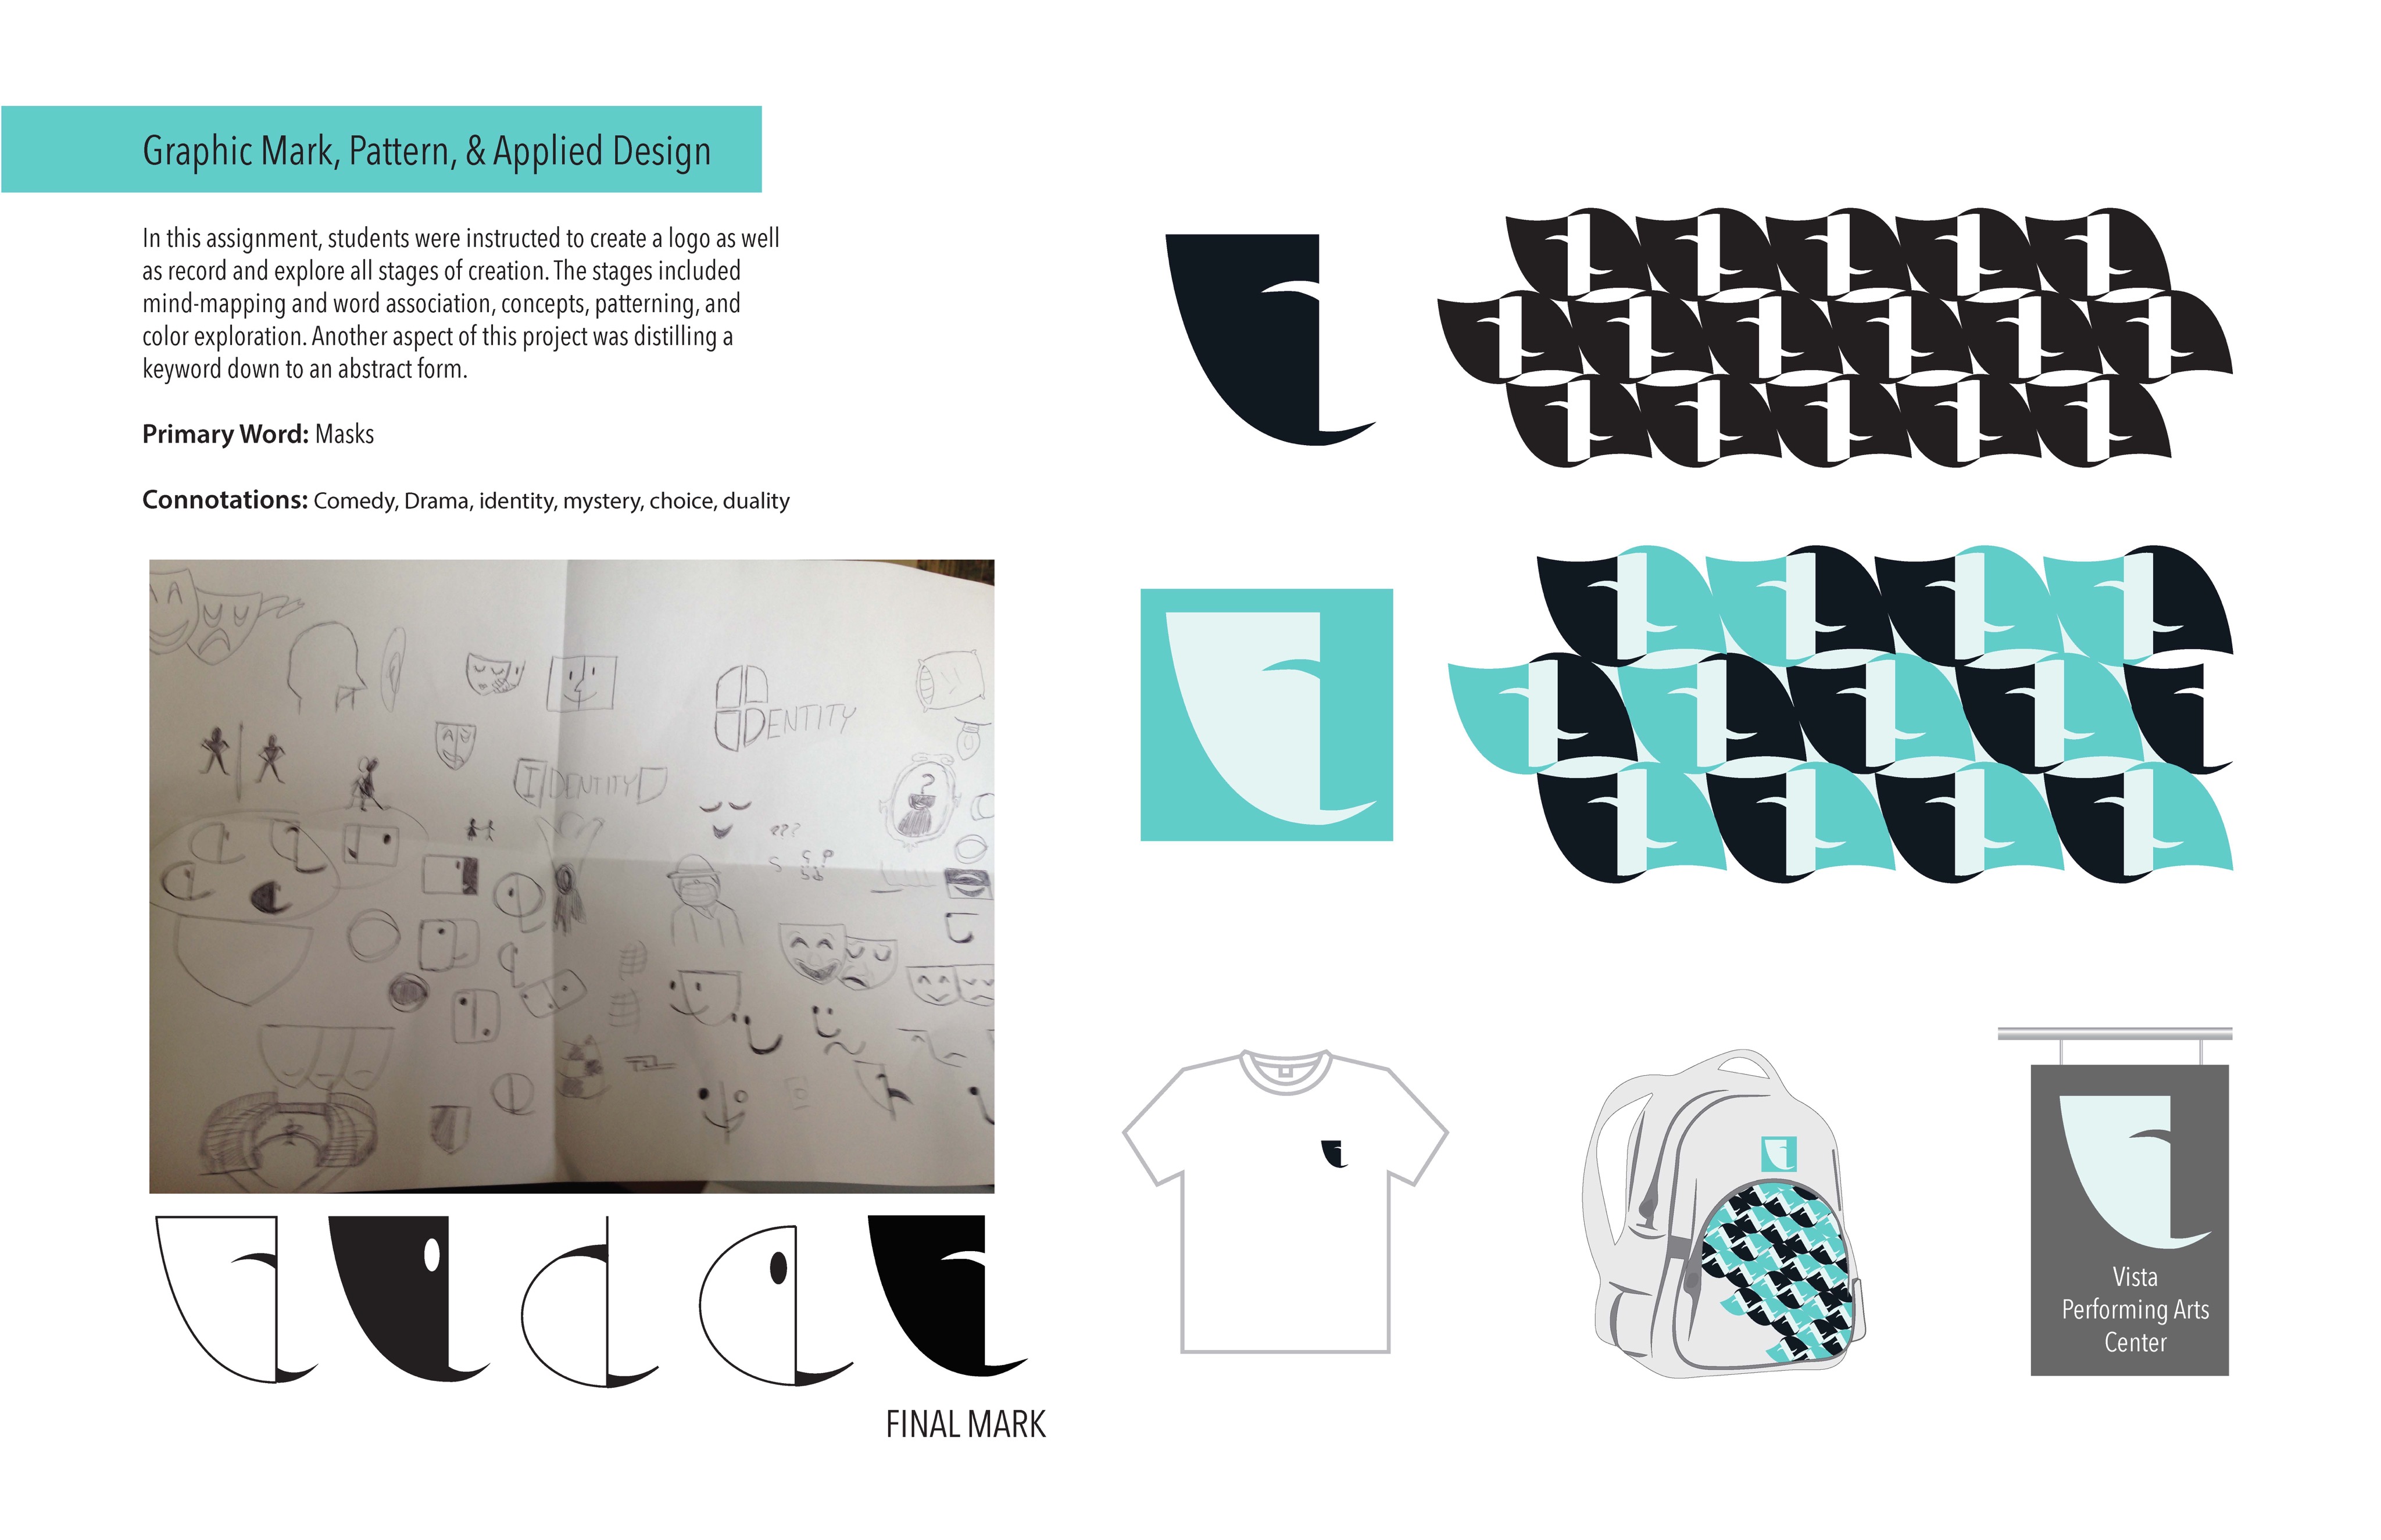
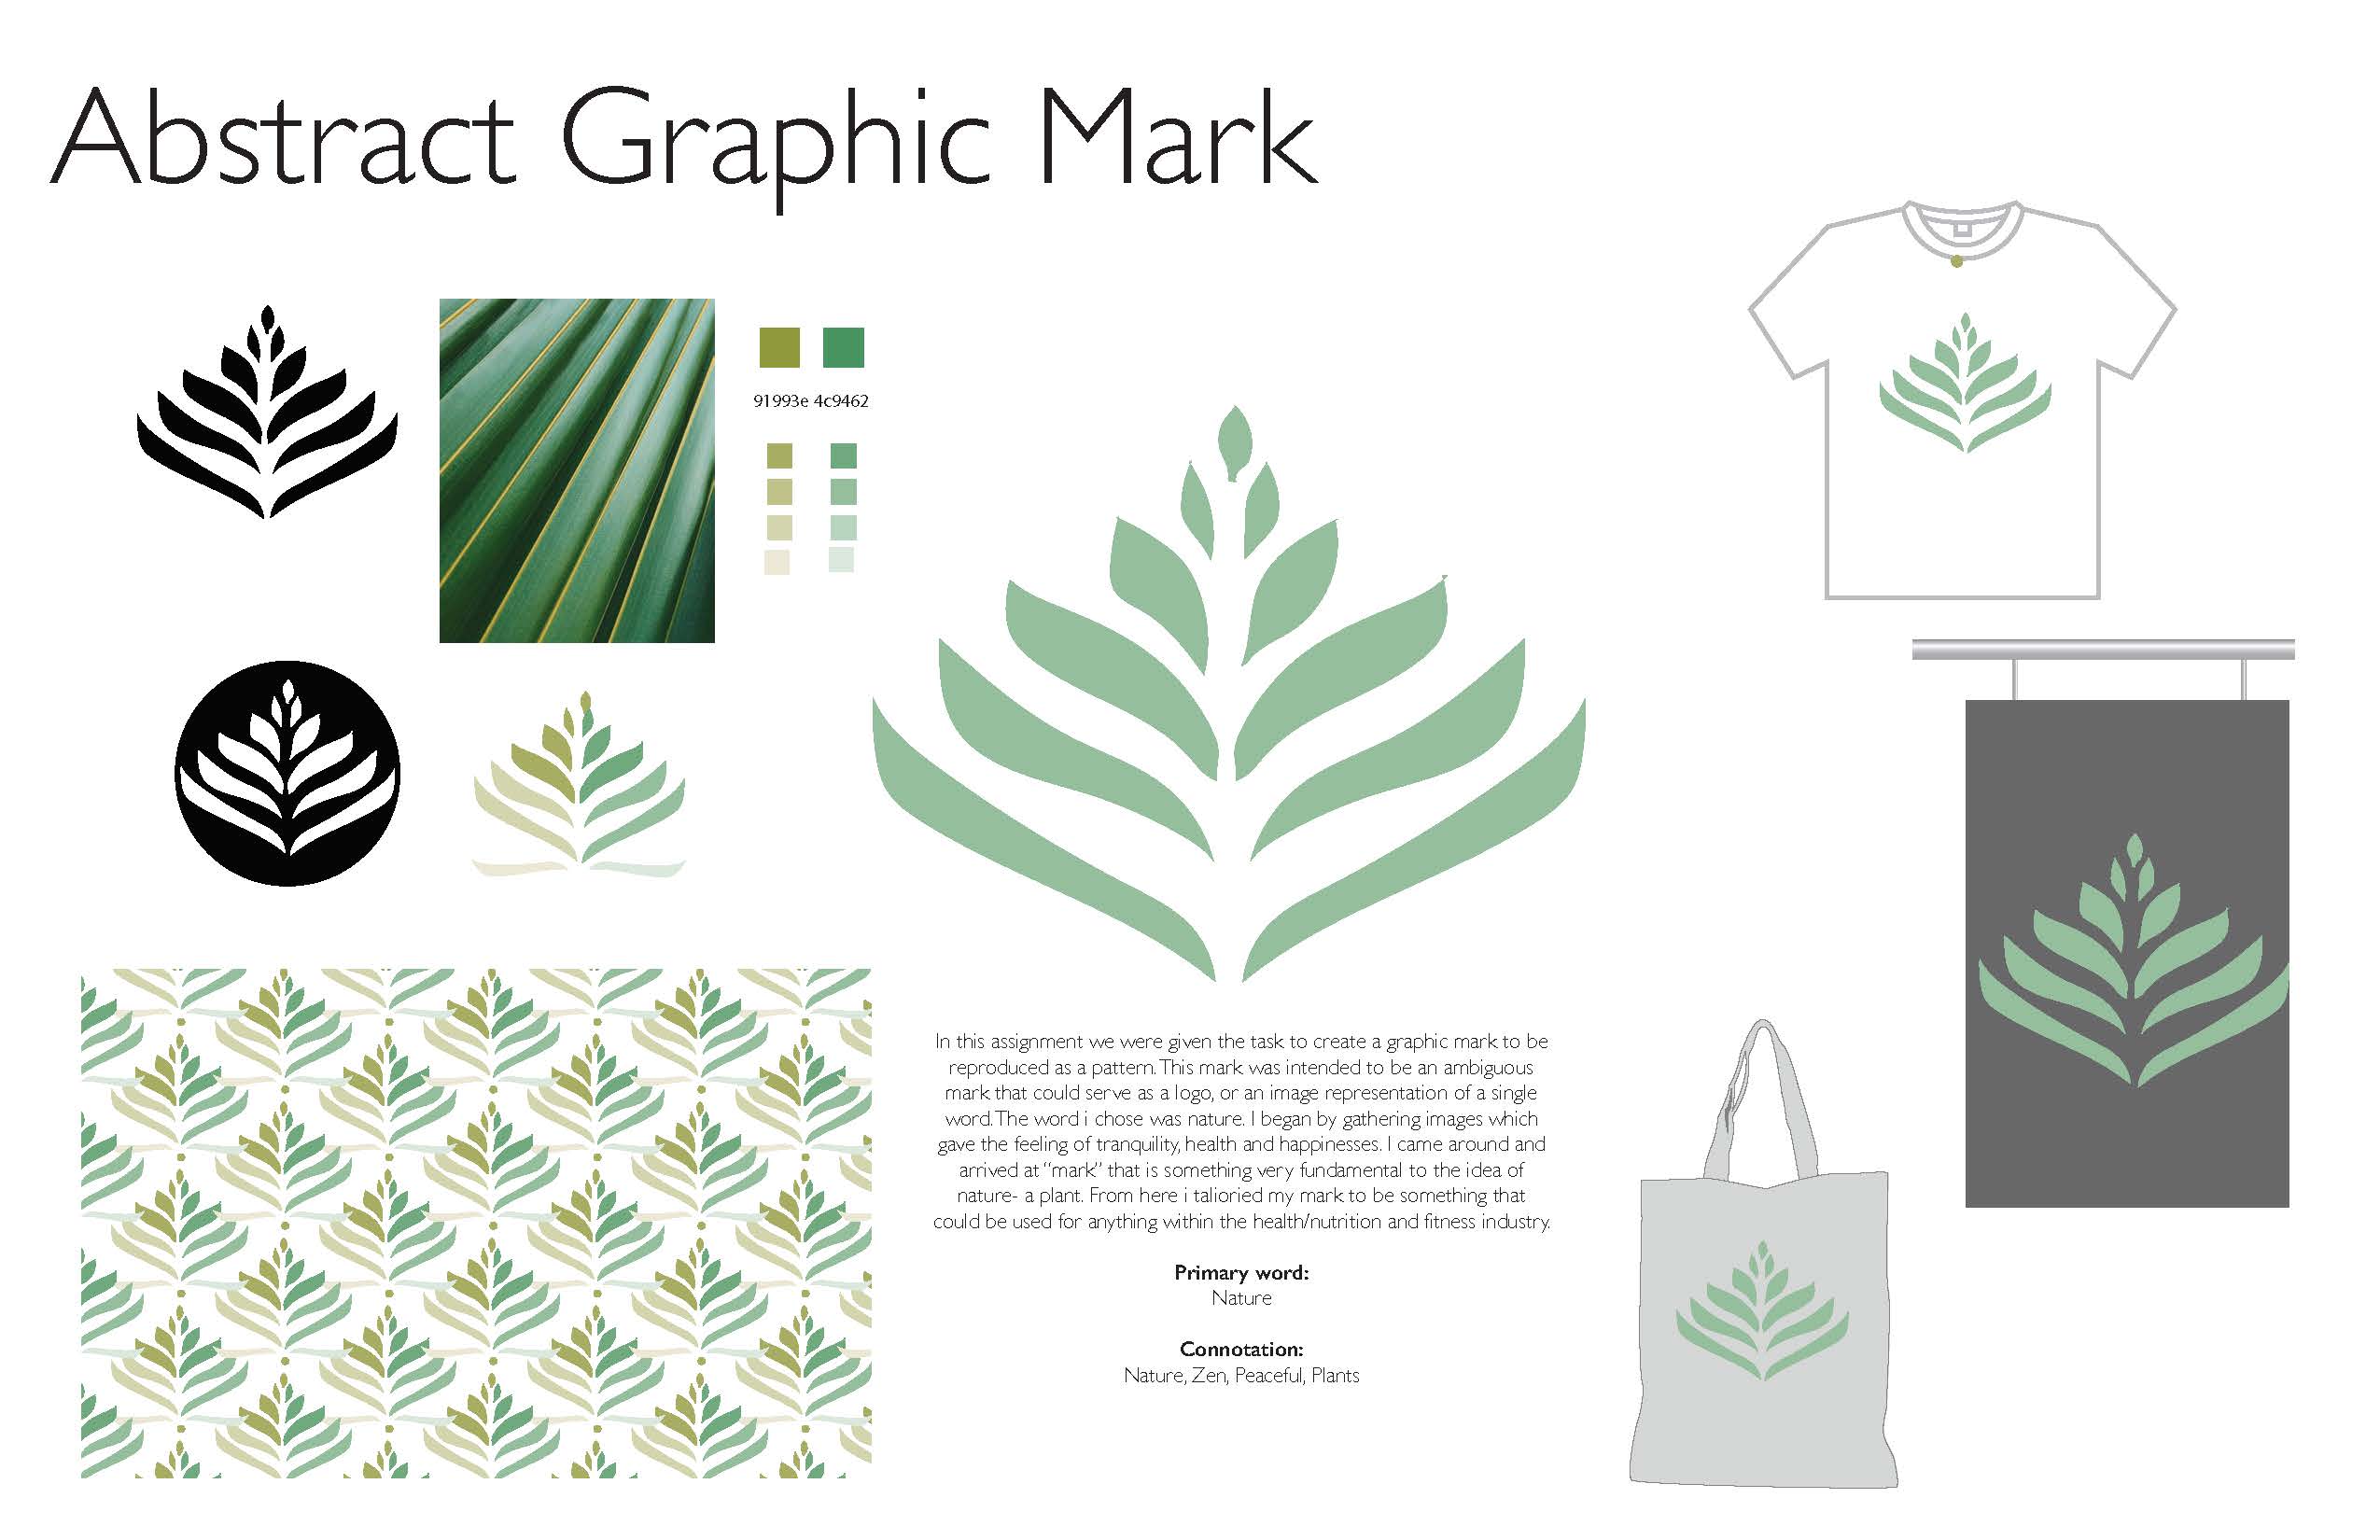
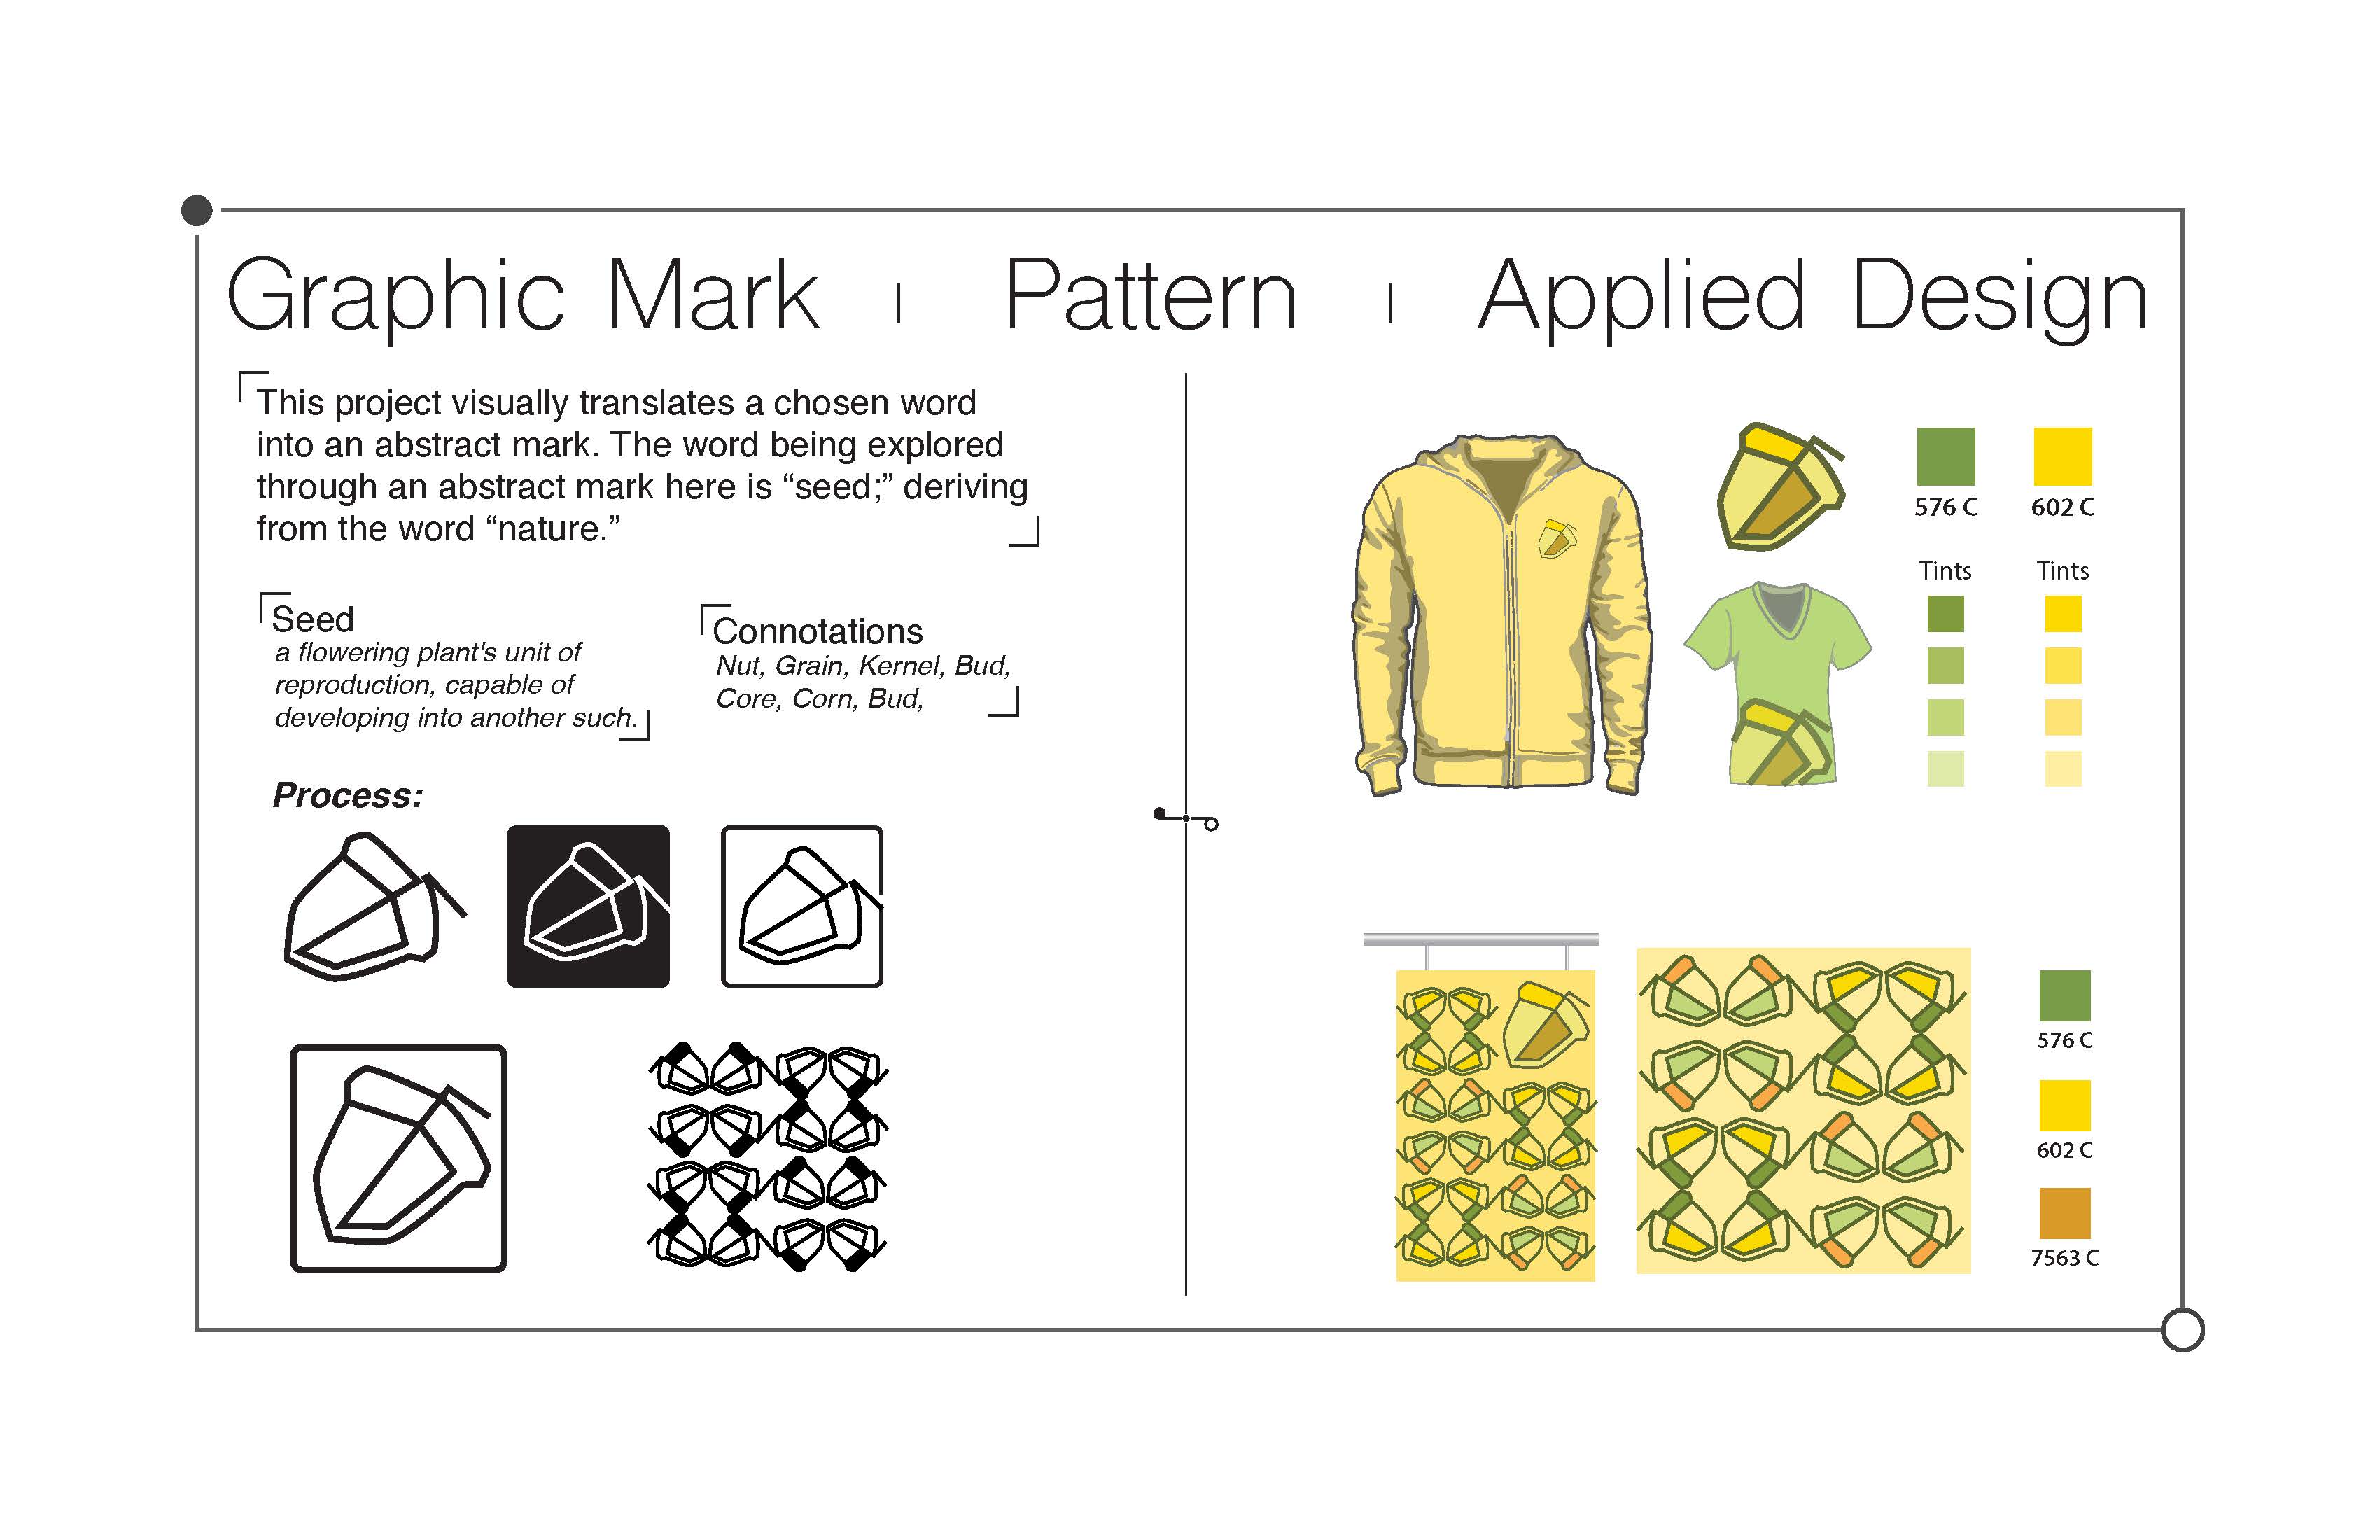
Using a modular grid similarly to Project 1.1, you will show your process of creating the abstract mark by exhibiting the following parts of processes you went through to create it and its peripheral components:
a) The final word, definition, and connotations you associated with it.
b) mark evolution (choose from iterative drawings, sketches, etc.)
b) the final mark and emblem (color)
c) the pattern
d) Pantone swatch selections that match at least one color component on the board
e) NEW : You will also apply the mark / pattern to product mockups. You can use either vector product mockups or photographic product mockups.
This “Project 3.1: Process Portfolio Spread” is intended to be a modular grid-based design spread that can either serve as a landscape orientation poster or a future page for a printed portfolio. It does not have to have a gutter in the center, but you can design a page fold gutter into it if you want.
Requirements for Print, Mounting, and Presentation
You will need to print this 17″ x 11″ file on a good quality paper either on a laser or inkjet printer. You can have this work printed at Kinkos or other similar professional printer.
The work must be fixed to a black mat board with either no border or a border less than 2″ all the way around. The fixative sould be a spray fix adhesive (no glue sticks) that will not bleed through. Furthermore, the mounting must include a name tag on the back of the work and a piece of tracing paper that folds over the front of the board in full. Use an artist tape to connect the tracing paper to the back of the board so that it cleanly folds over the front to cover the entire work.
What’s Due
1) Upload your digital file to the appropriate discussion.
2) Present your printed work in a mounted format in class for a critique.
How You Will Be Graded
- Effective presentation of processes (35%)
- Design sophistication in your layout (35%)
- Craftsmanship in your mounted work’s presentation (30%)
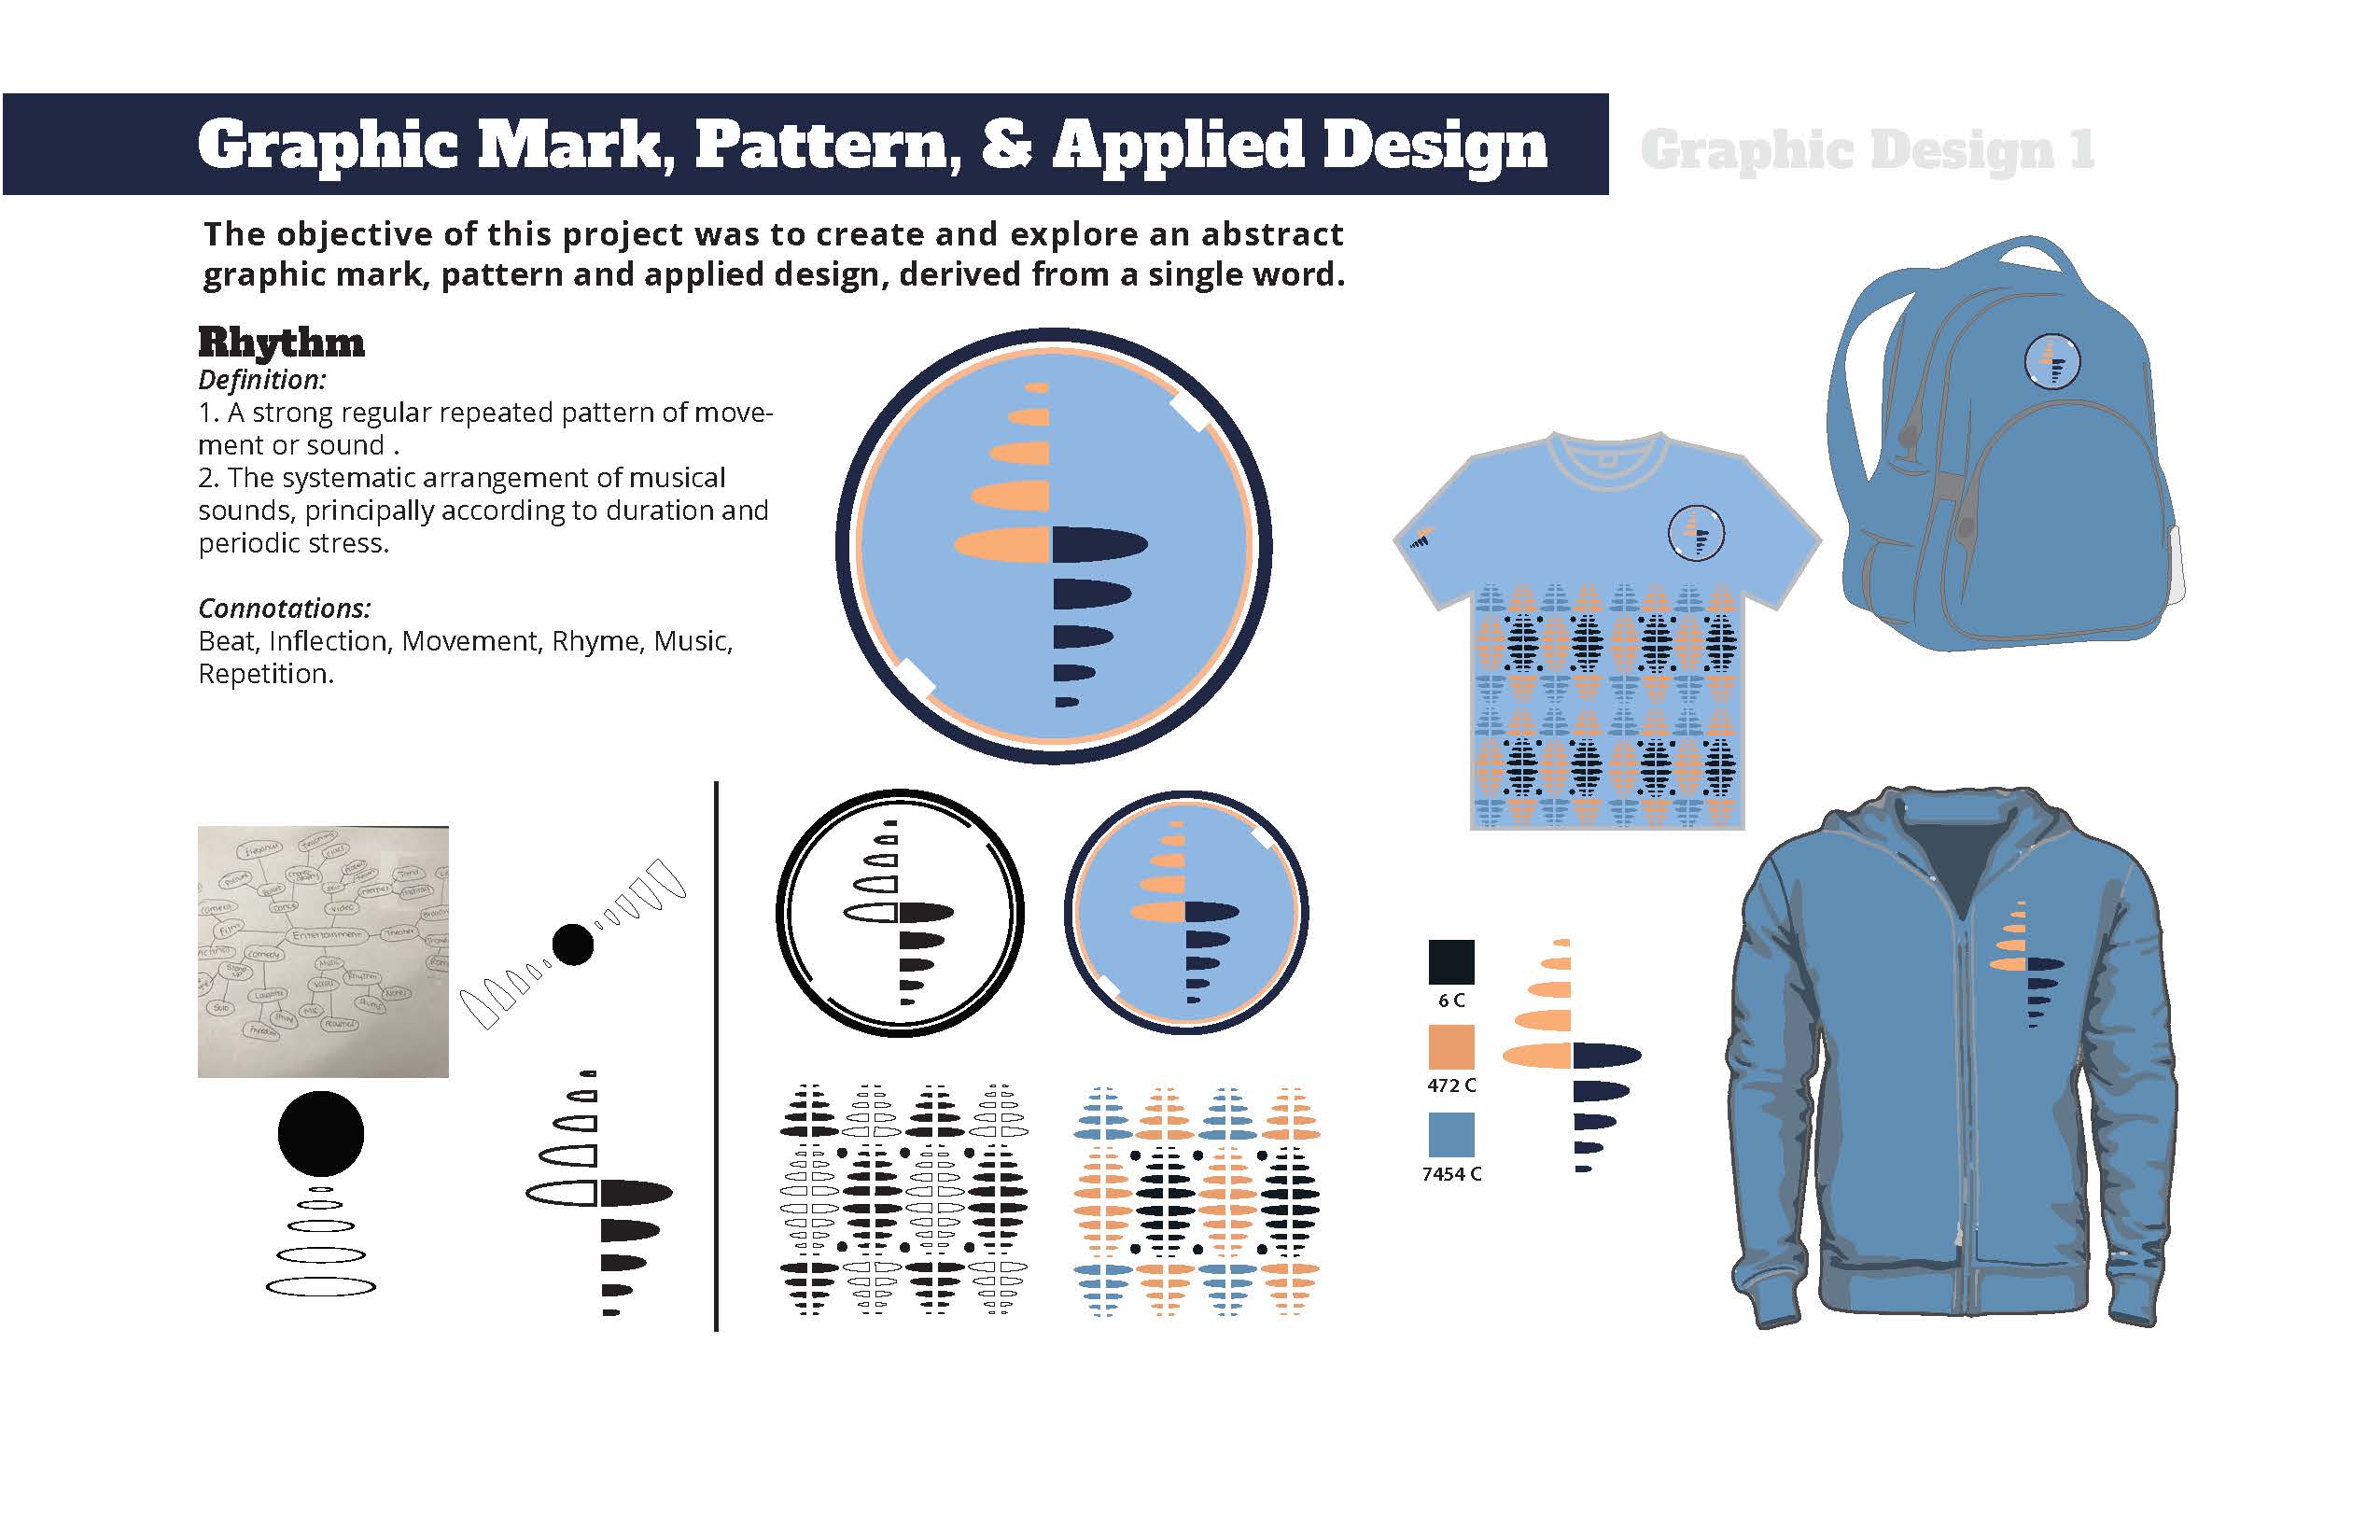
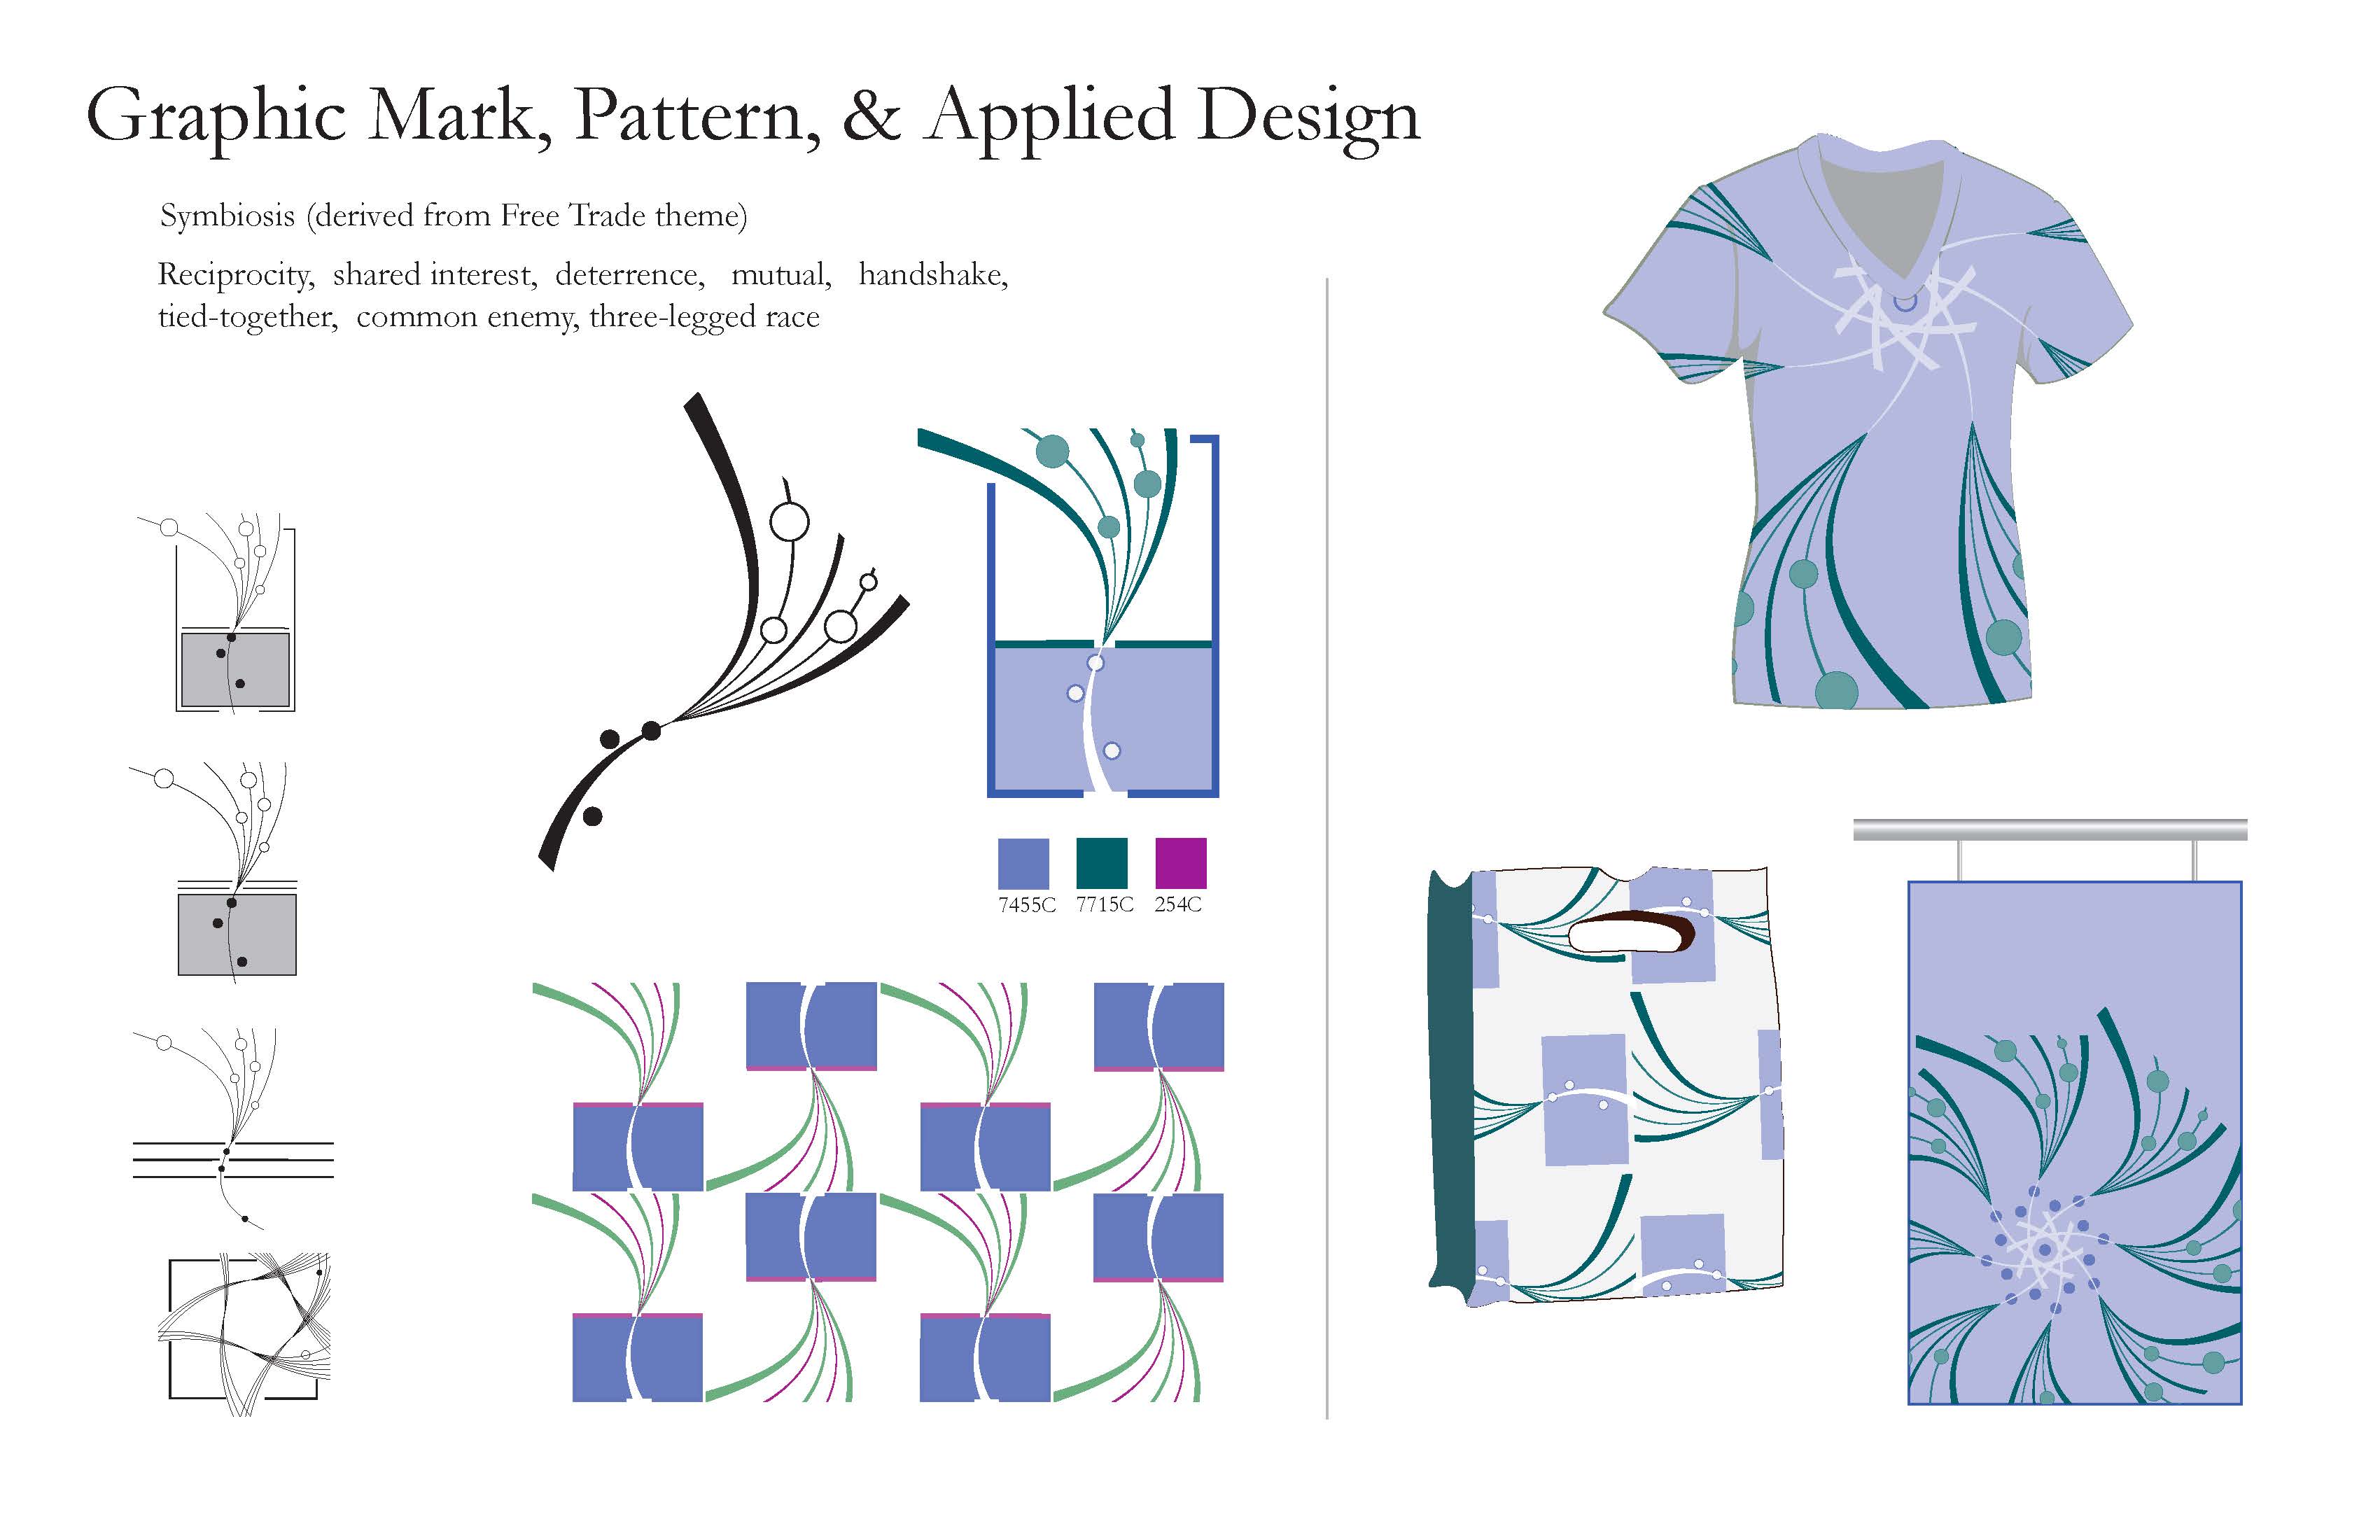
Former Student Examples
You can check out some former student examples in this PDF or view them below.