This is by far the instructor’s FAVORITE free editor on the market today! It is intuitive and easy to use, although it has features that are surprisingly rich for a free code editing tool.
Komodo Edit Download link: http://komodoide.com/download/#edit
While students can use other editors, this is the instructor pick!
Komodo Edit Tutorial -Part 1 (14:52)
This beginning tutorial covers the following:
- getting around the basic interface
- setting preferences
You can also download the Komodo Edit Preference Settings PDF that has screenshots of all the important settings. You can use this to match the instructor’s settings if you want the same behaviors and environment as in many of the tutorials. If you don’t care about WHY the settings do what they do and want to save some time, you can use this pdf and skip the video.
UPDATE: The video below was done in an older version of Komodo than the newest available version, but the instructions are still the same. One thing that looks quite different is the launch screen, which now looks like this (and Windows users will launch Preferences from there):

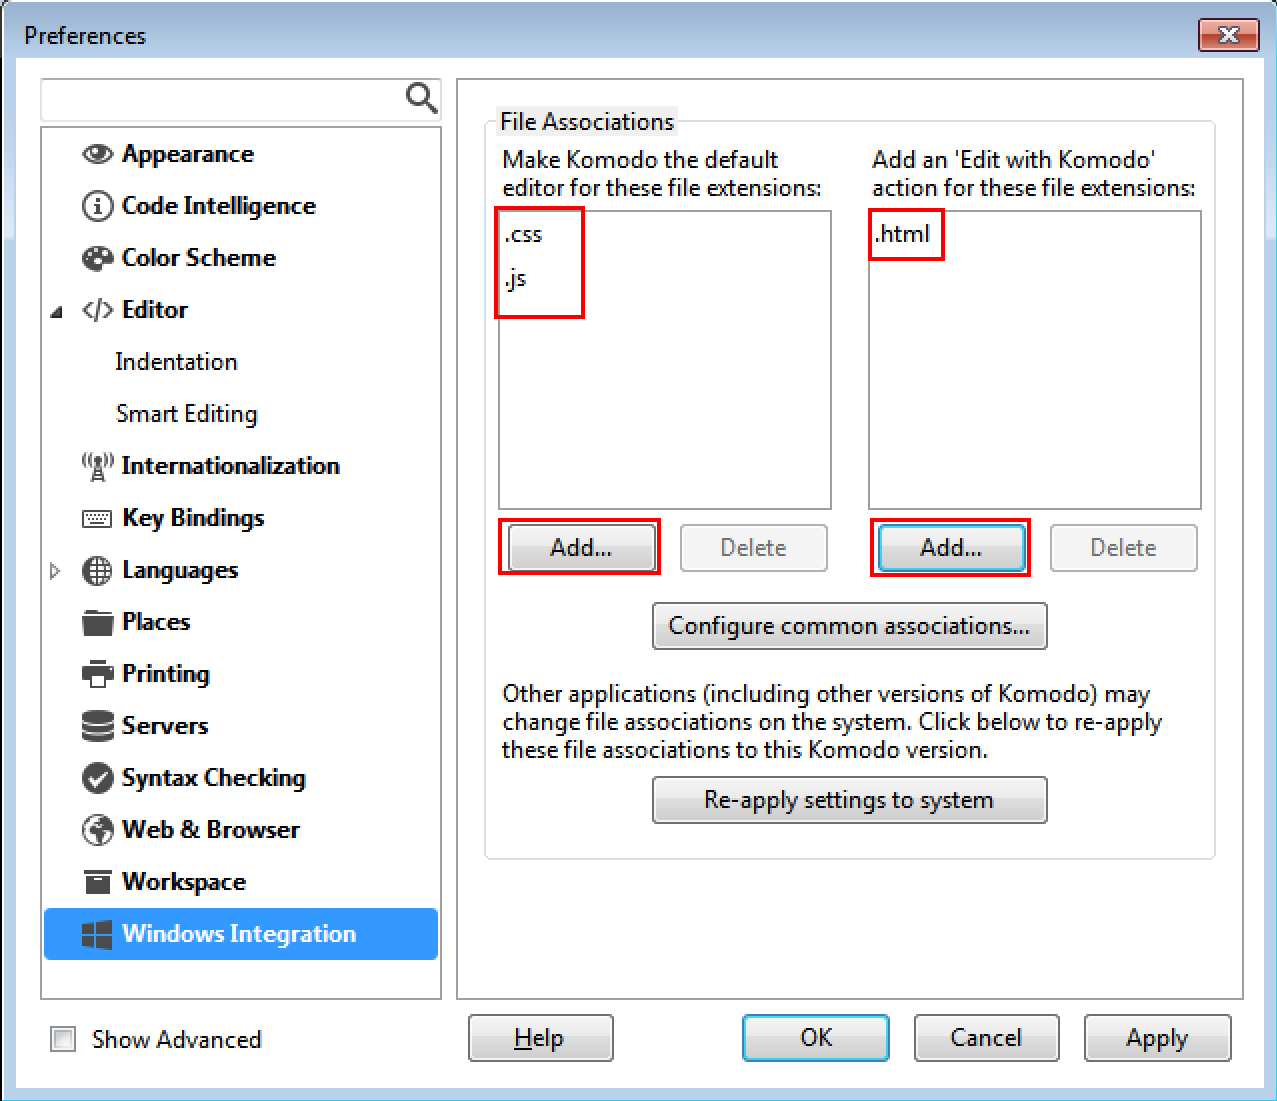
Additionally, Windows users will have an extra Preferences Setting option to set file type associations for Komodo Edit. Set them as follows:
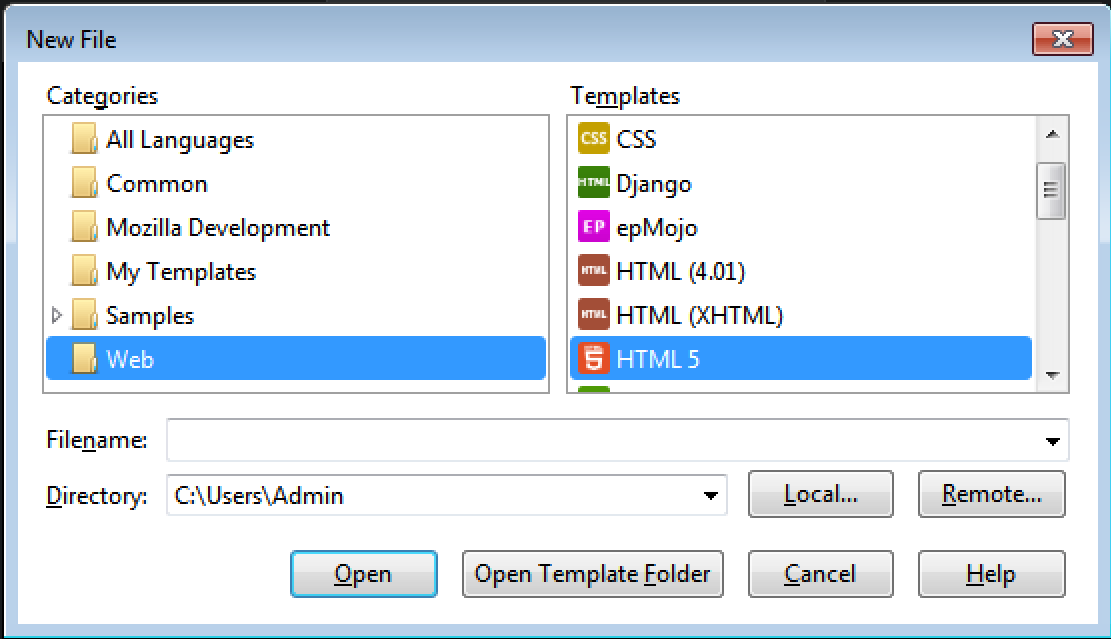
Lastly, Windows users will create new files from the top right “hamburger menu icon” (3 horizontal lines), and choose “New > New File From Template” and then from the “Web > HTML5” template option, as follows:

Okay, finally…the video:
Komodo Edit Tutorial – Part 2 (14:53)
This second tutorial covers the following:
- creating a project
- creating new files
- navigating interface panels
- brief discussion of which doctype to use and why (HTML5 v. XHTML)
- Creating your folder structure for MAT-125 class
- Intro to viewing your work
UPDATE: The video below was done in an older version of Komodo than the newest available version, but the instructions are still the same. Another thing that looks somewhat different:
- the “fold” or “collapse” icons are now dropdown arrows instead of + and -.
Click the title link above to view larger in new window.
Komodo Edit Tutorial – Part 3 (14:58)
This last tutorial covers the following:
- previewing your edits in a browser
- dealing with different “split view” arrangements
- code prompts
- pre-fab snippets
- adding comments
- seeing how autocompletion works
Click the title link above to view larger in new window.